So for the price the MLA-30+ is a half way decent antenna once you get rid of the horrible coax and upgrade to a better loop material. Replacing the 5v bias-t with a proper 12 volt low noise bias-t with a ultra low noise power supply helps significantly as well.
I found this video on YouTube and decided to give it a go. The following is my take on the project.
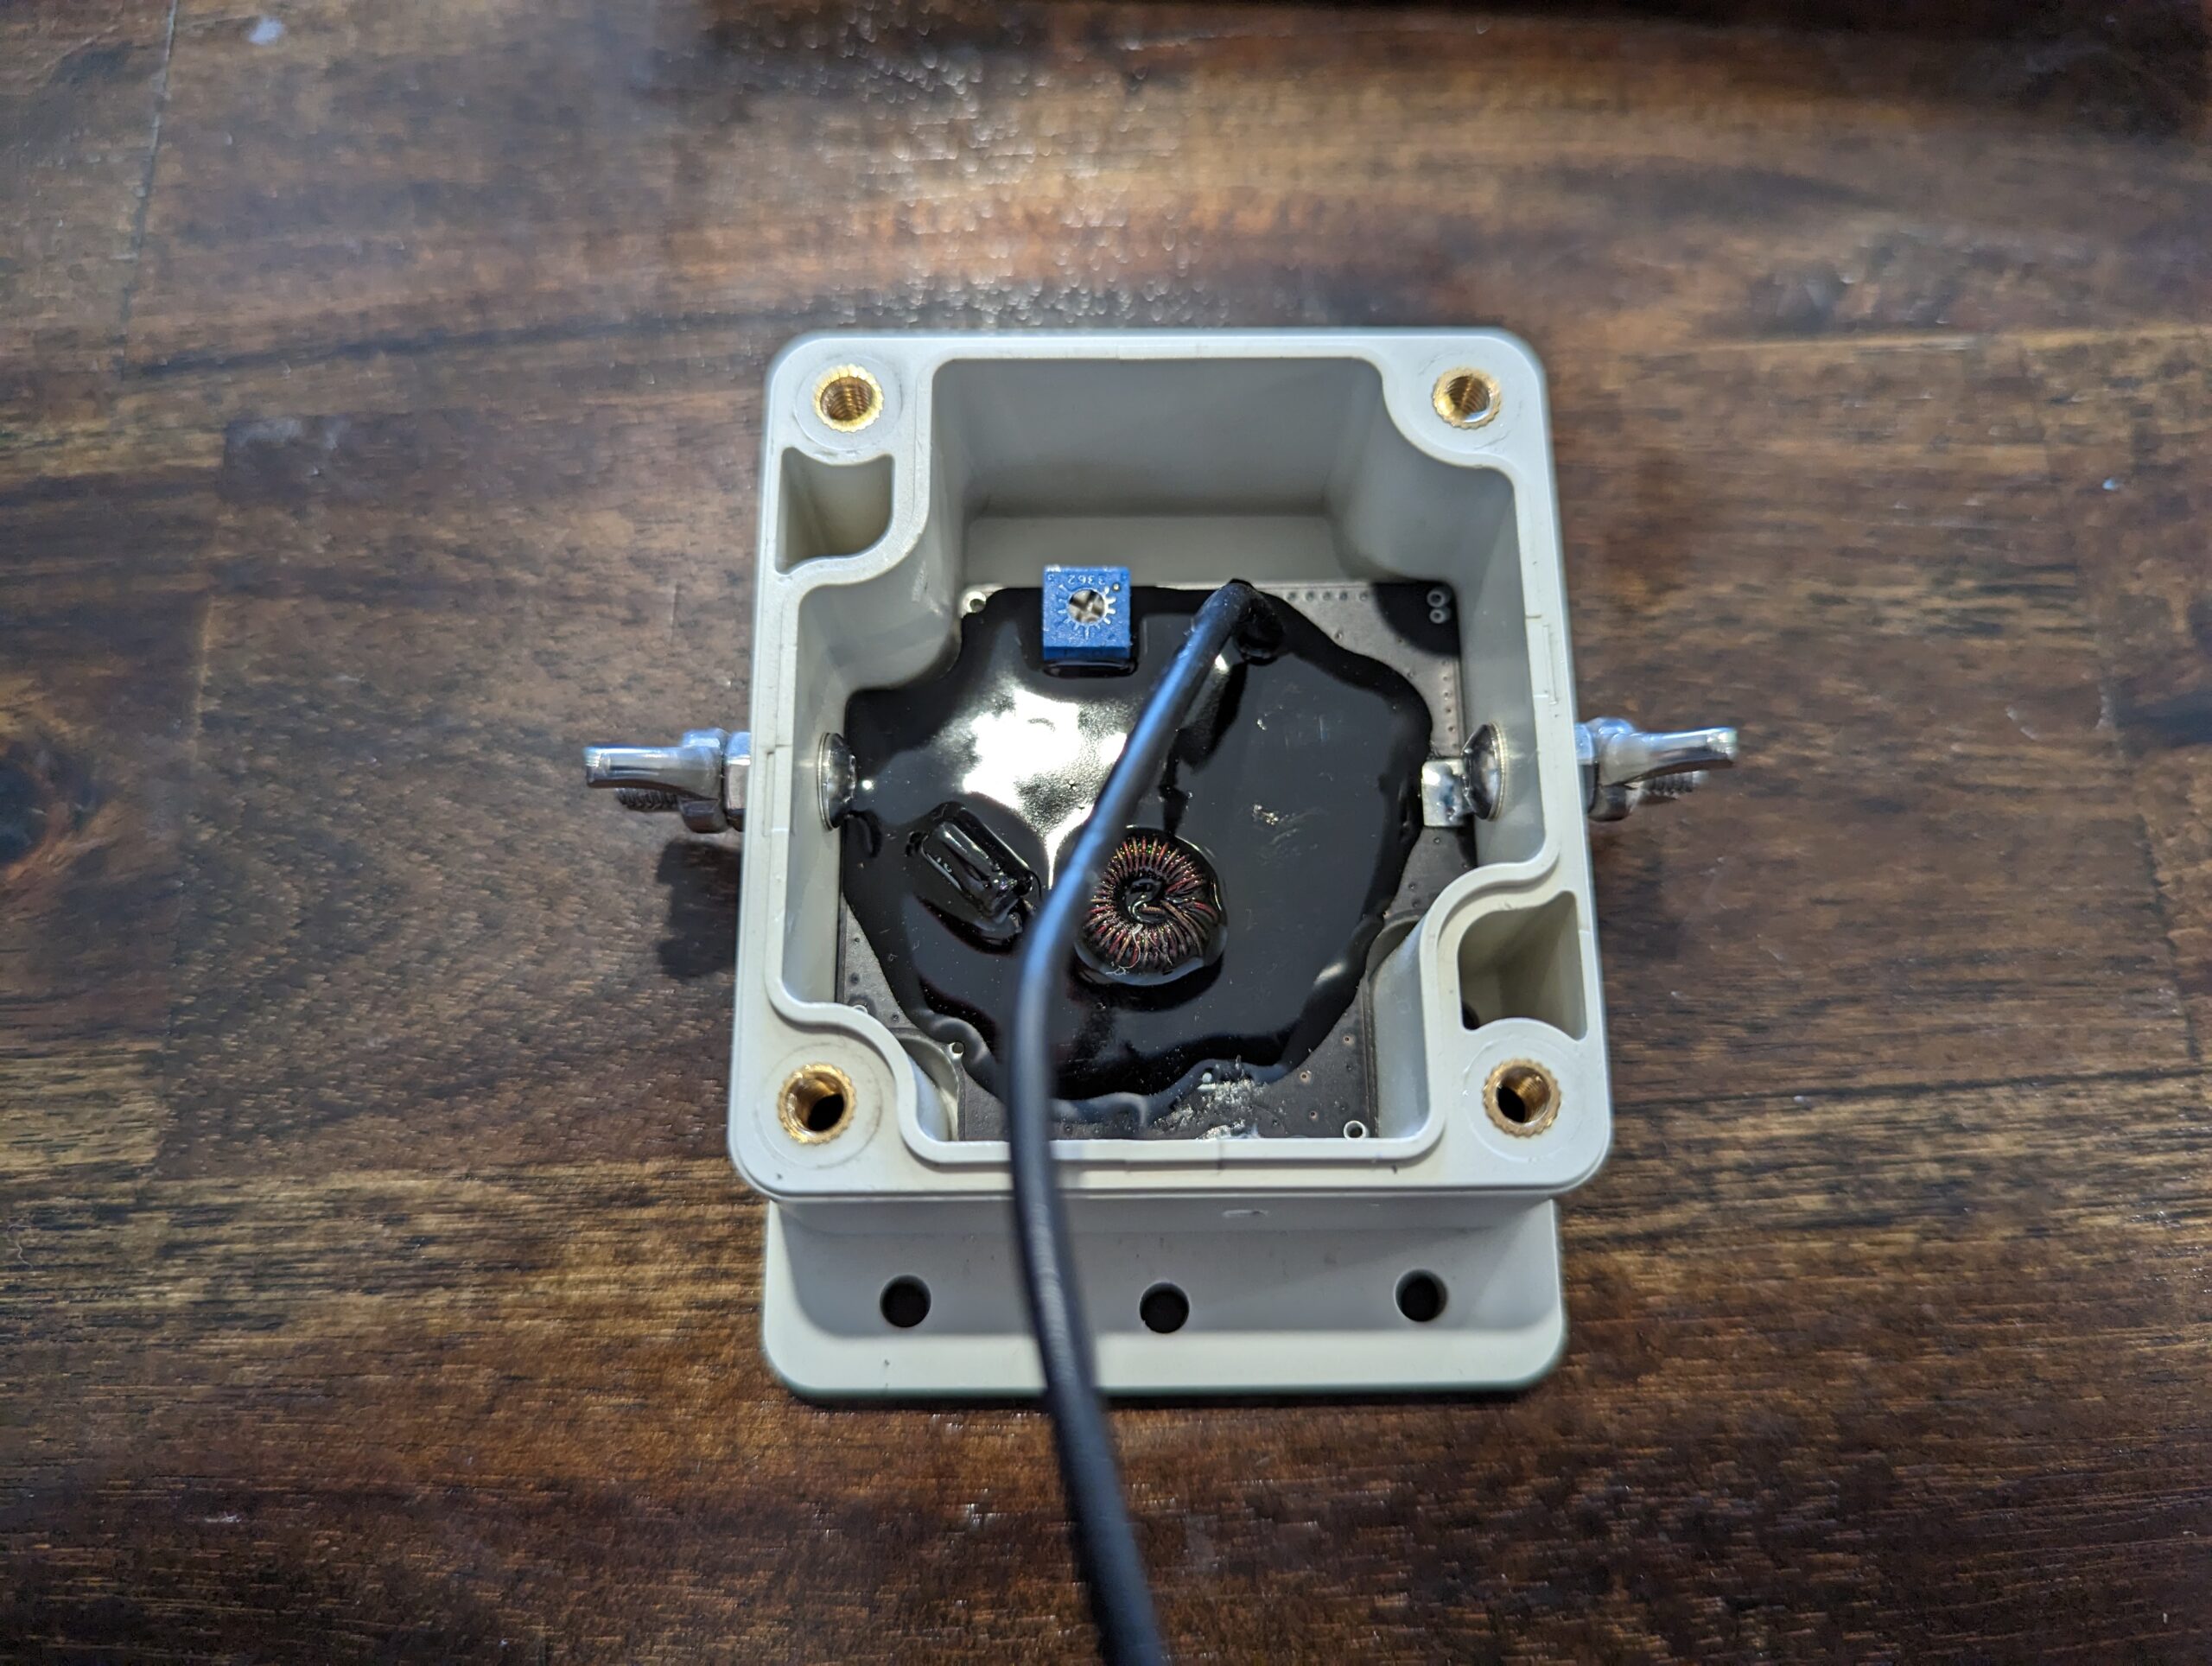
First we need to remove the 4 screws and the cover. I then cut the coax a few inches out of the box and pulled it through the hole.
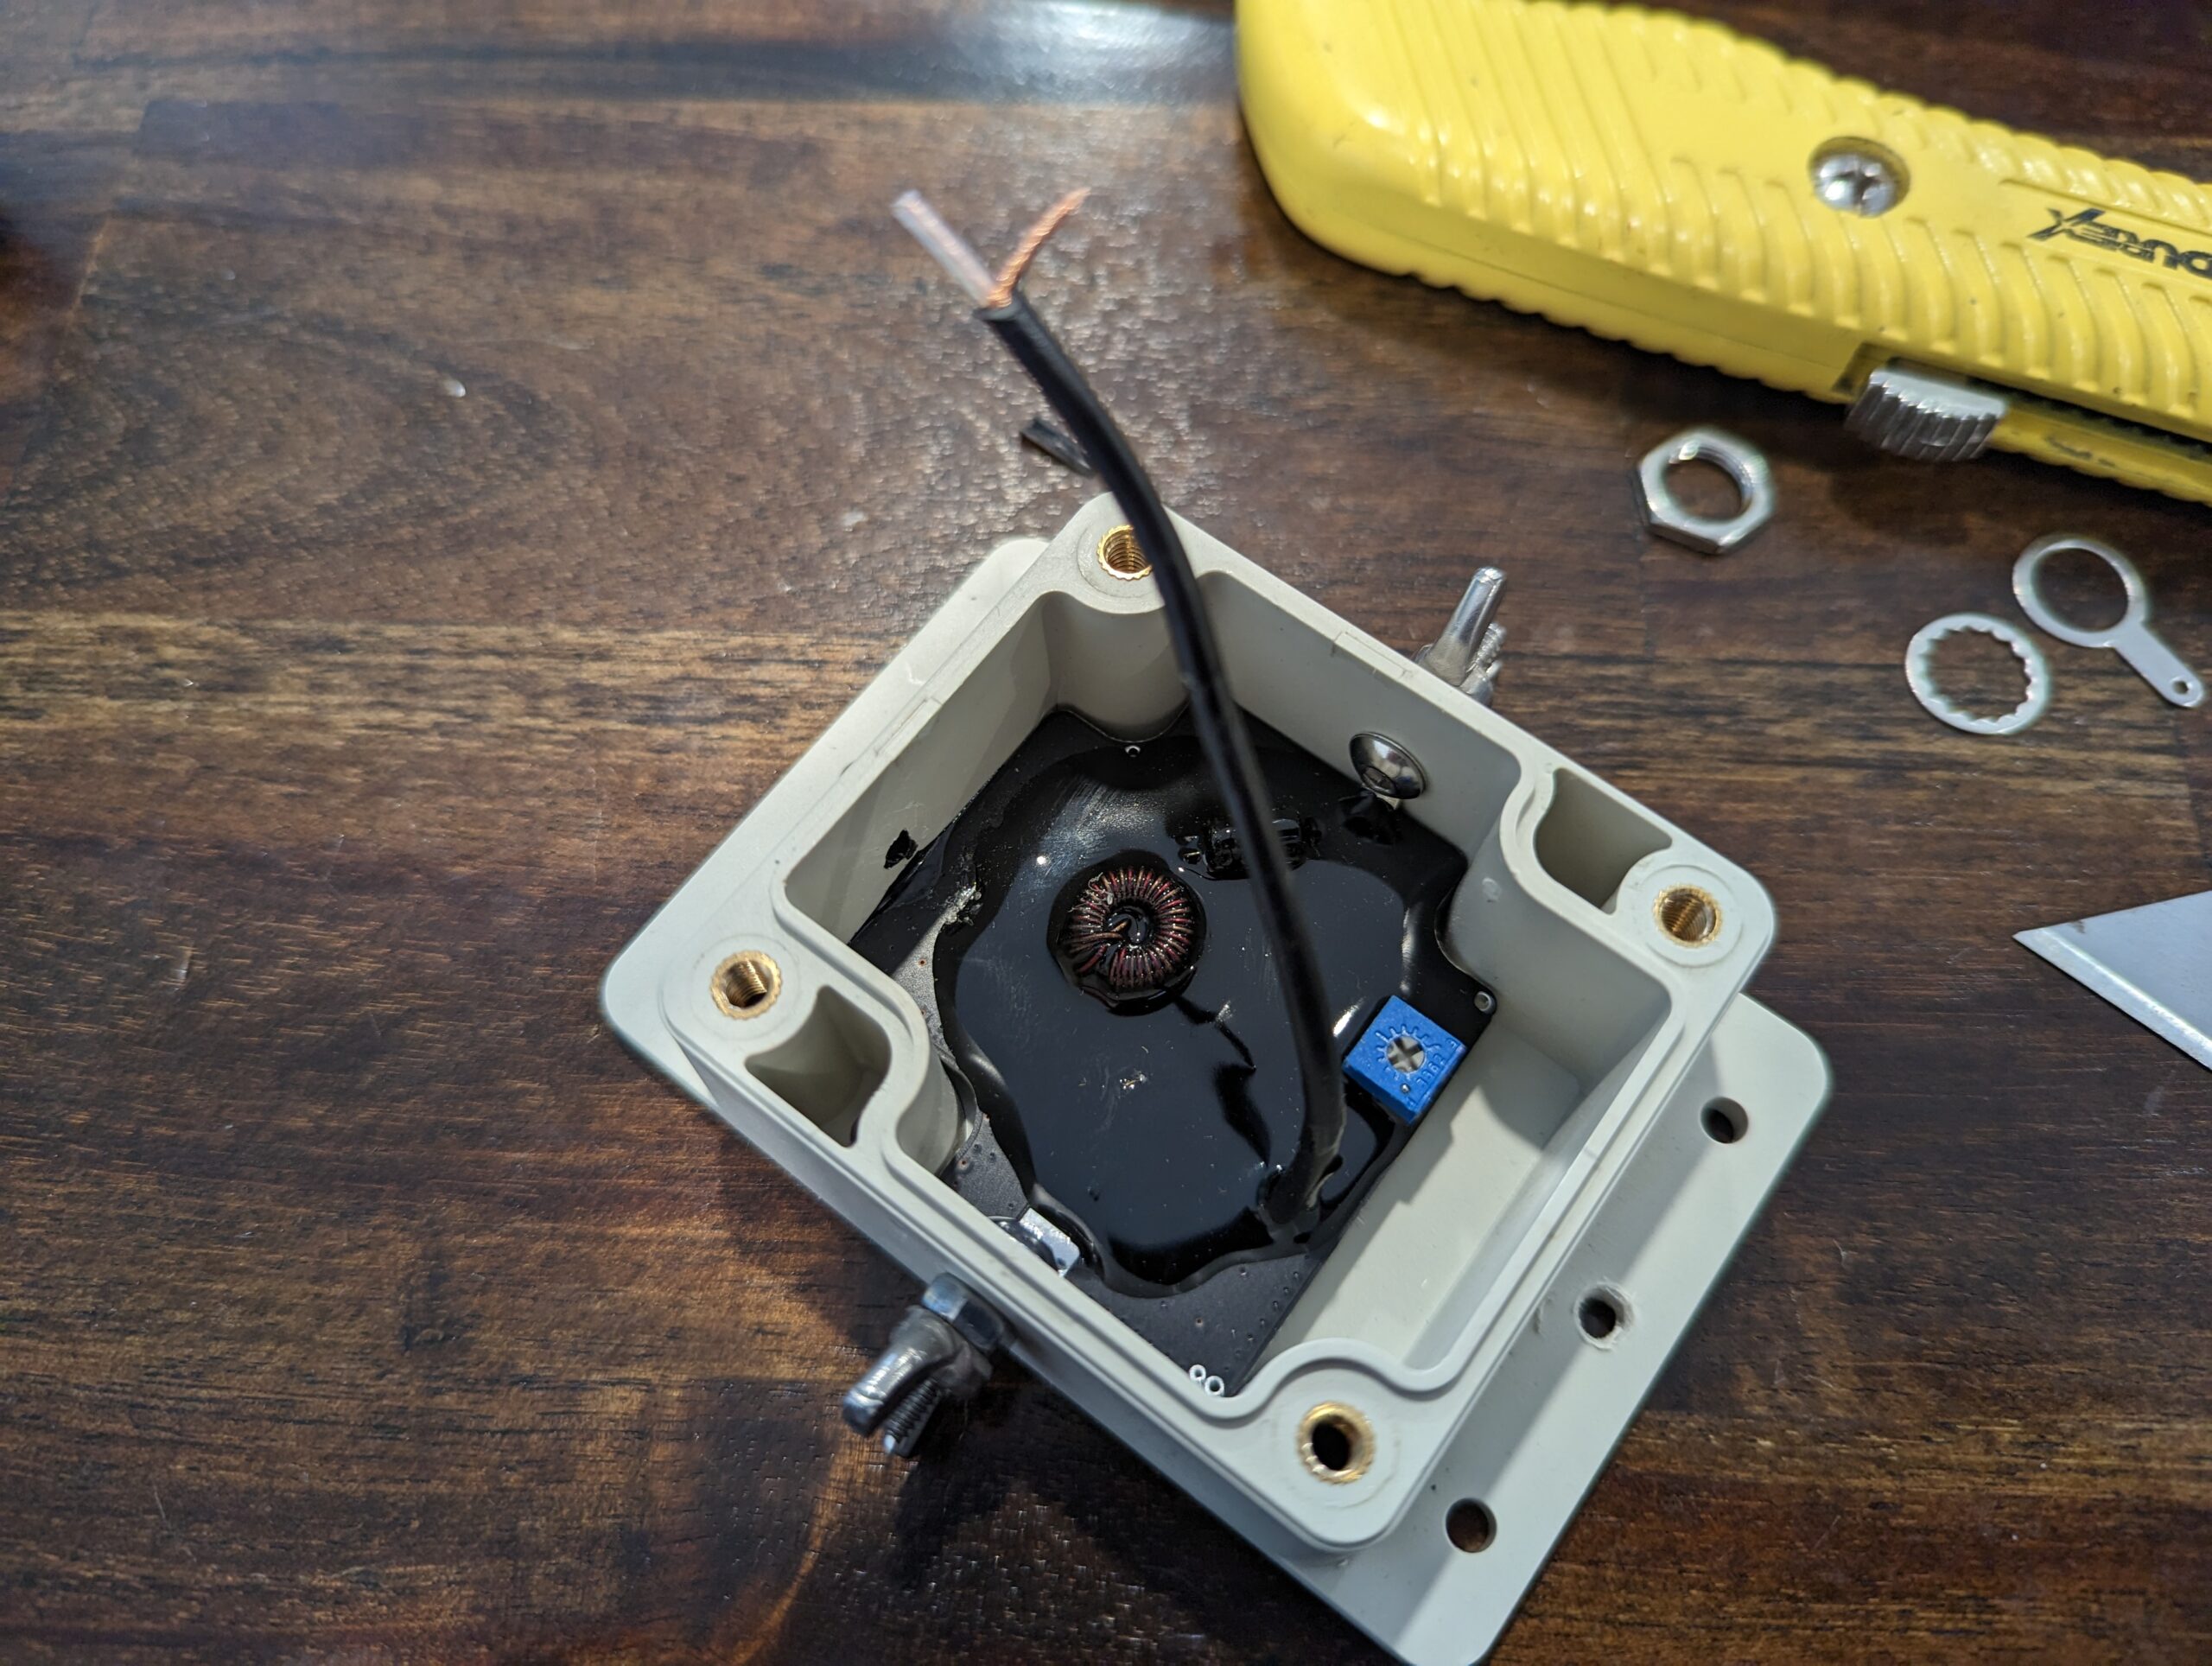
Next cut the coax down and strip the jacket away exposing the shield. Separate the shield from the center conductor and strip a small part of the center conductor’s jacket.
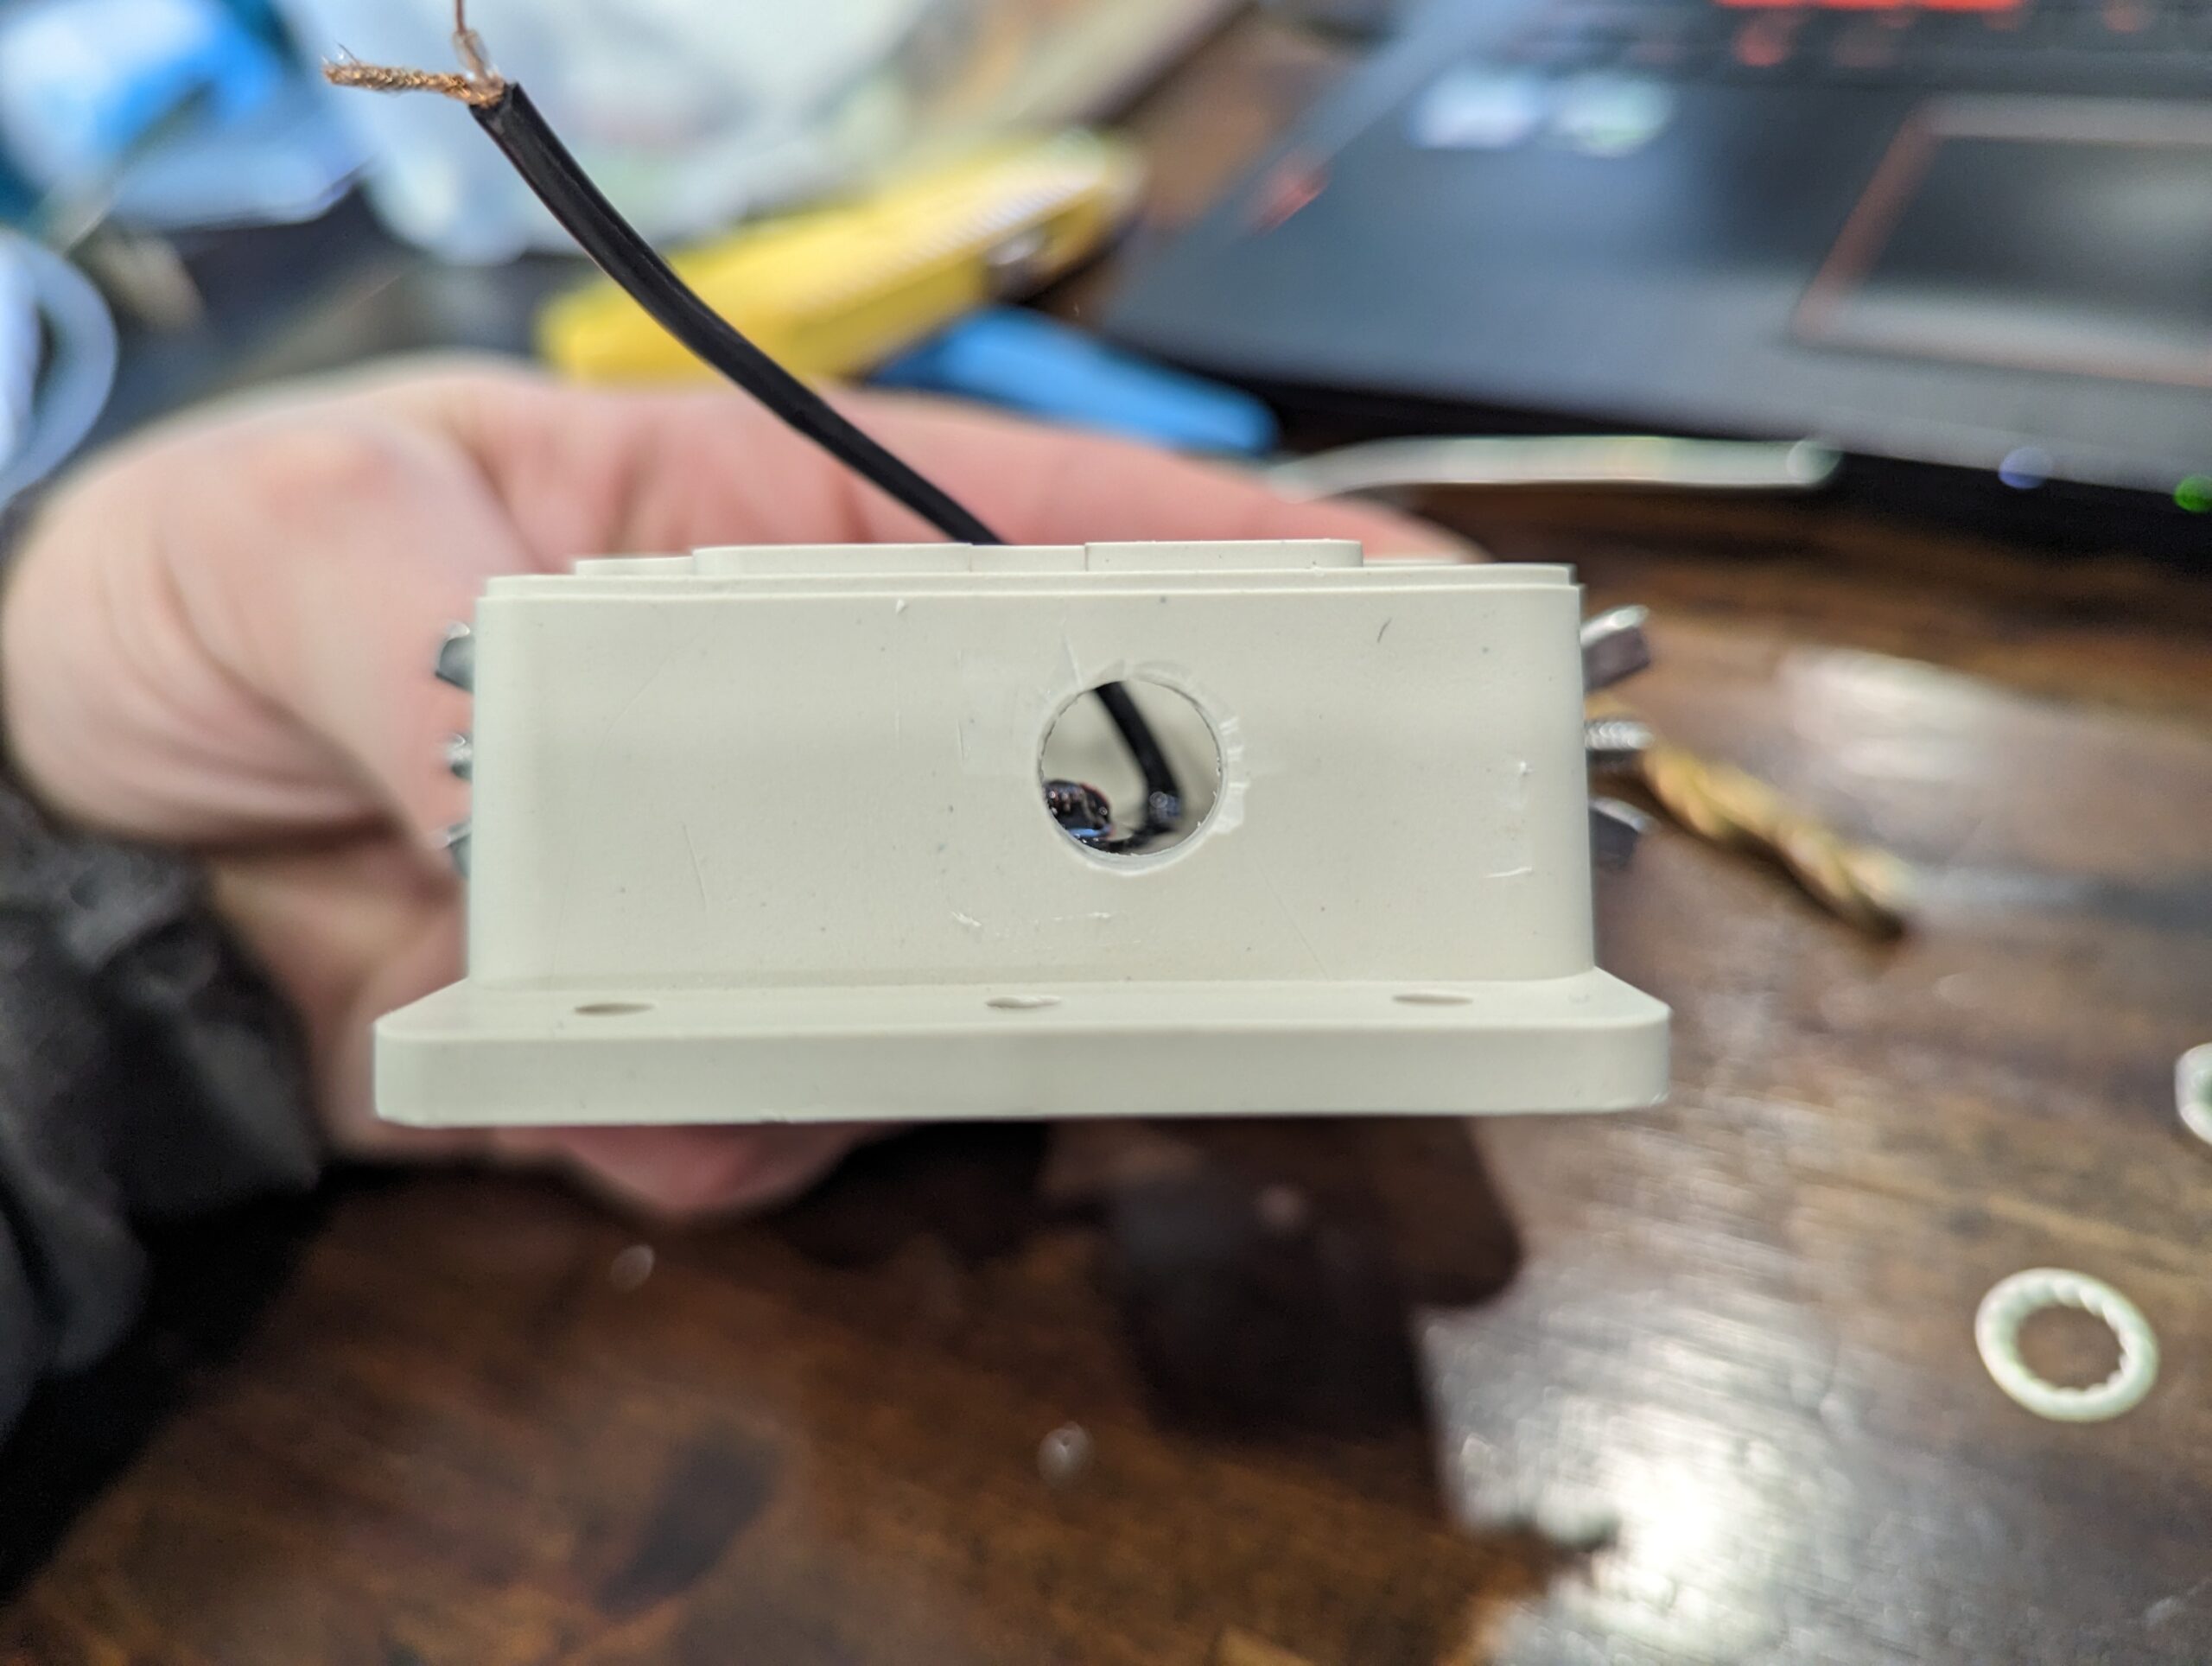
You need to drill a hole for the BNC connector starts small work your way bigger taking care not to damage the circuit board when you pop the drill bit through the back side of the case. My drill bit does not have a marking on it so I do not know the exact size I ended up with.

Insert the BNC connector through the hole and tighten the washer and nut. Then we will need to solder the center conductor from the coax to the center pin of the BNC connector and then the shield from the coax to the ground of the BNC connector.
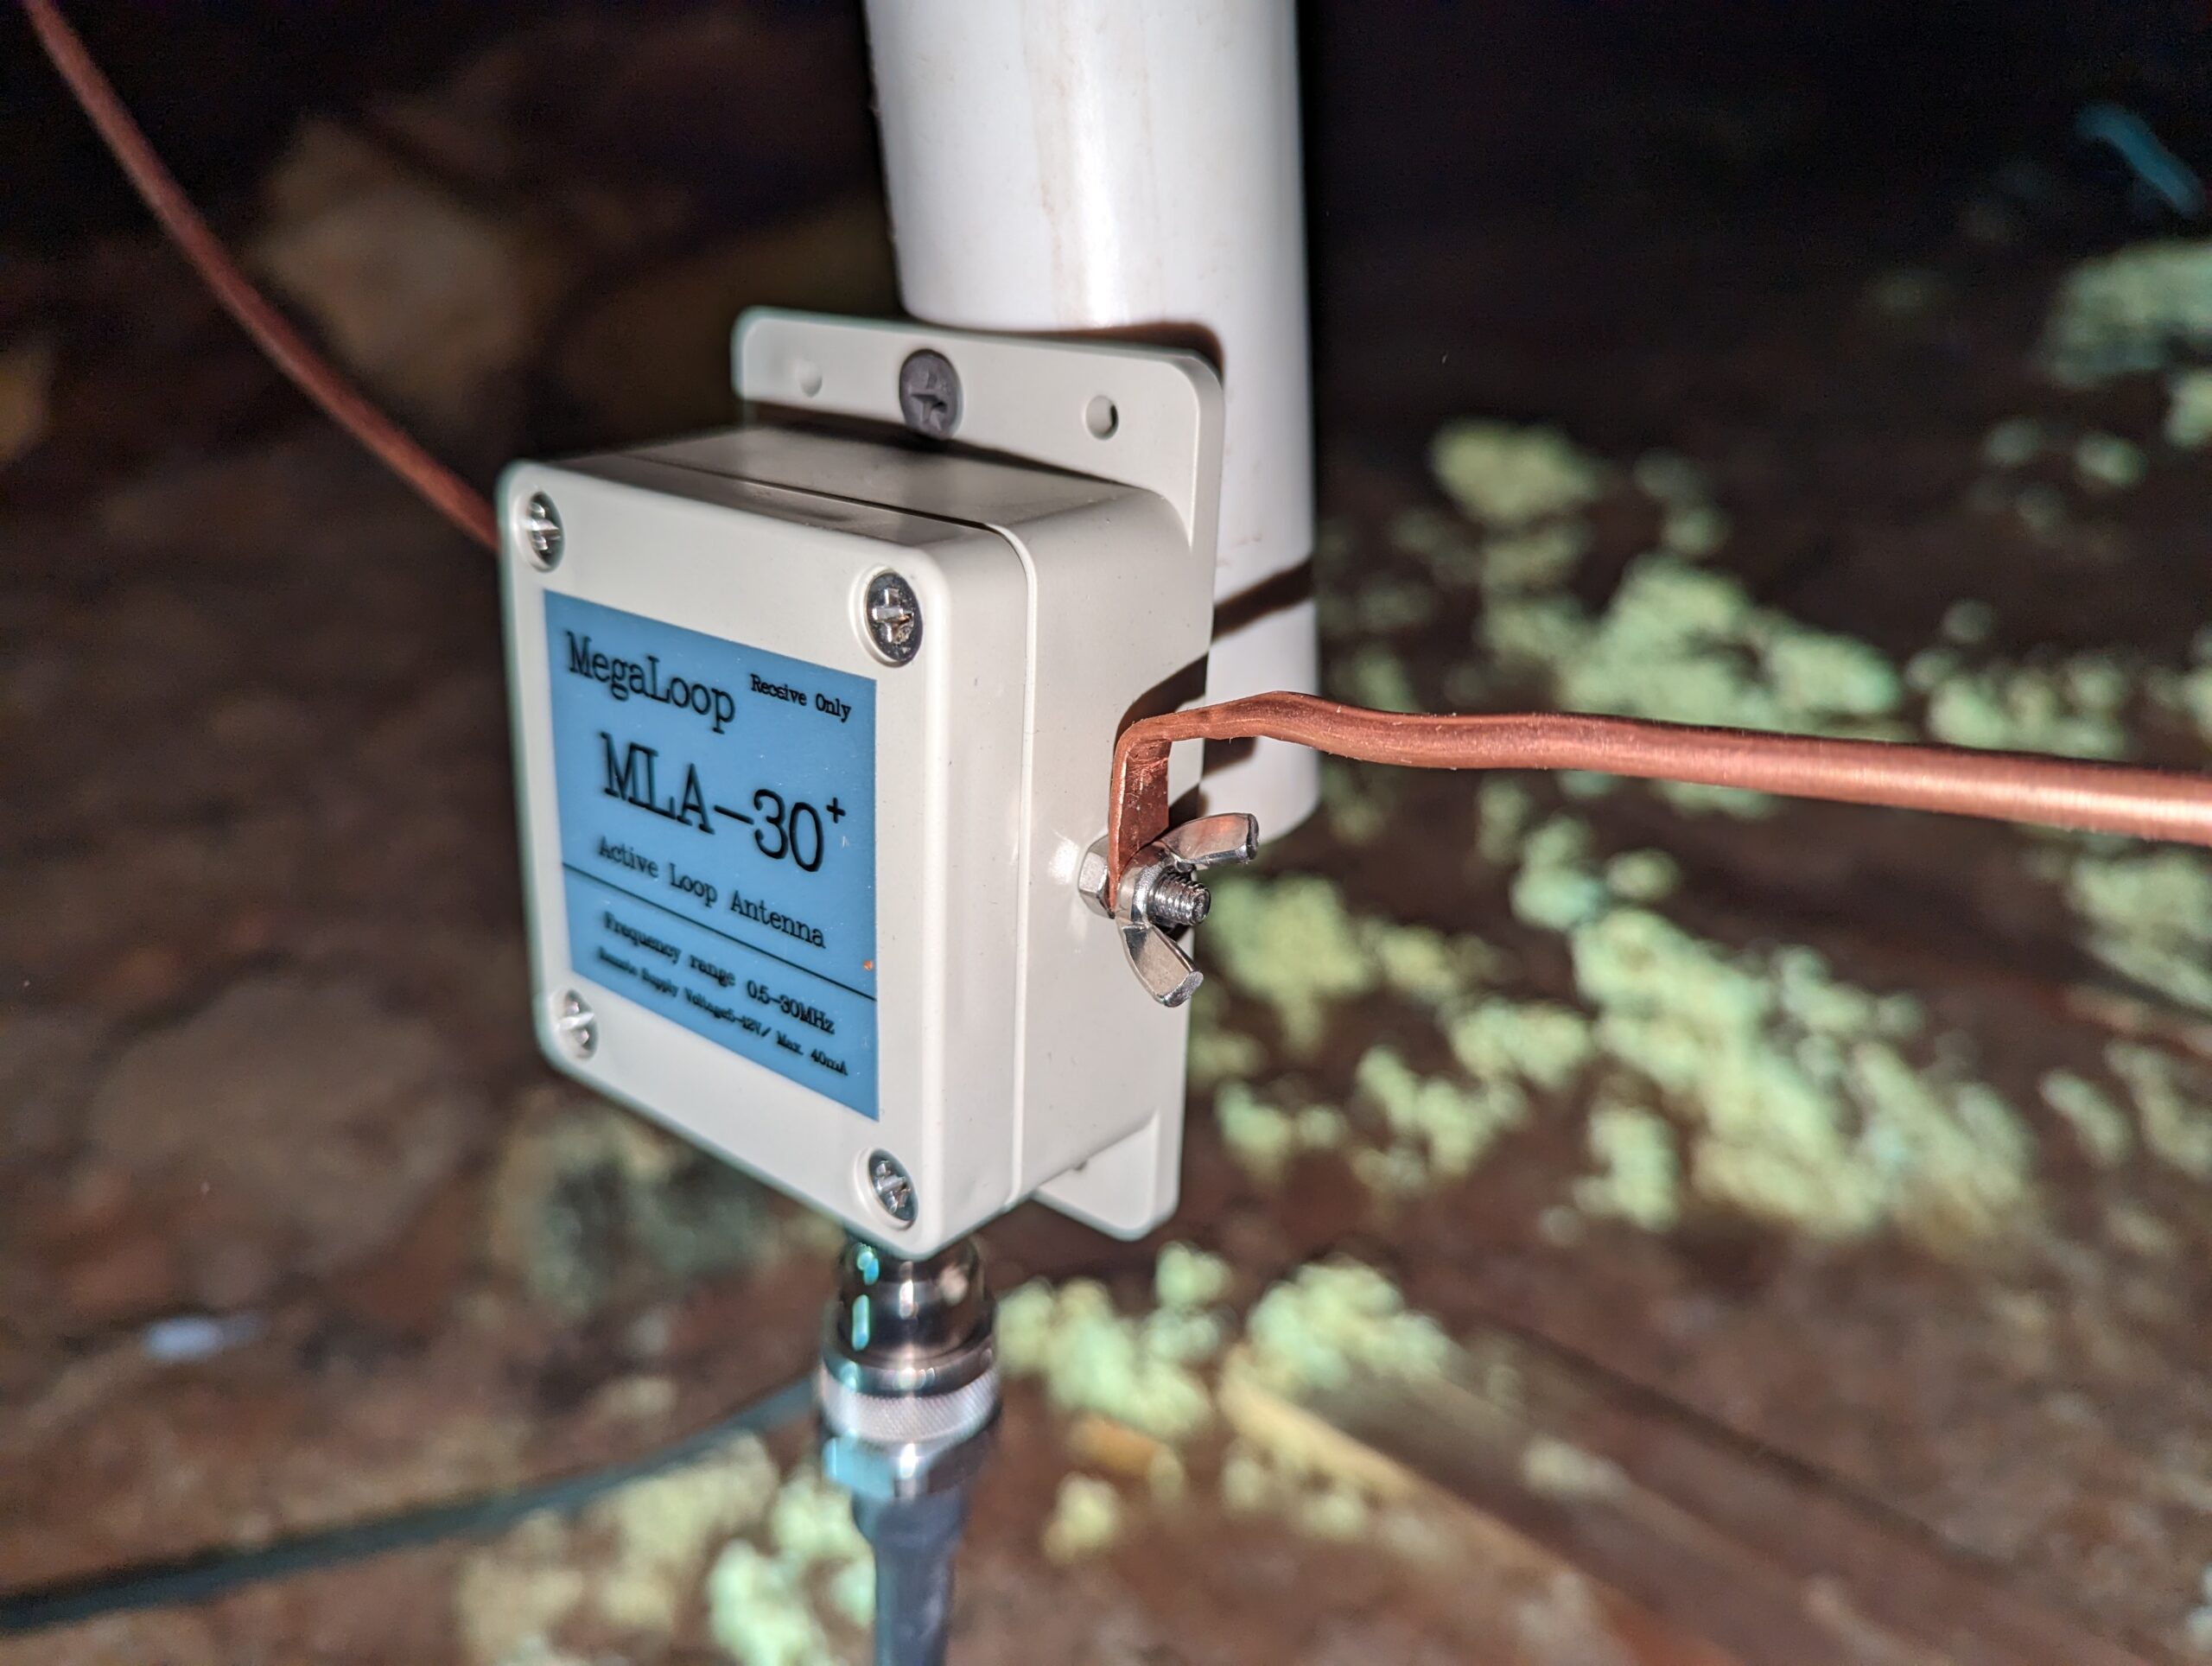
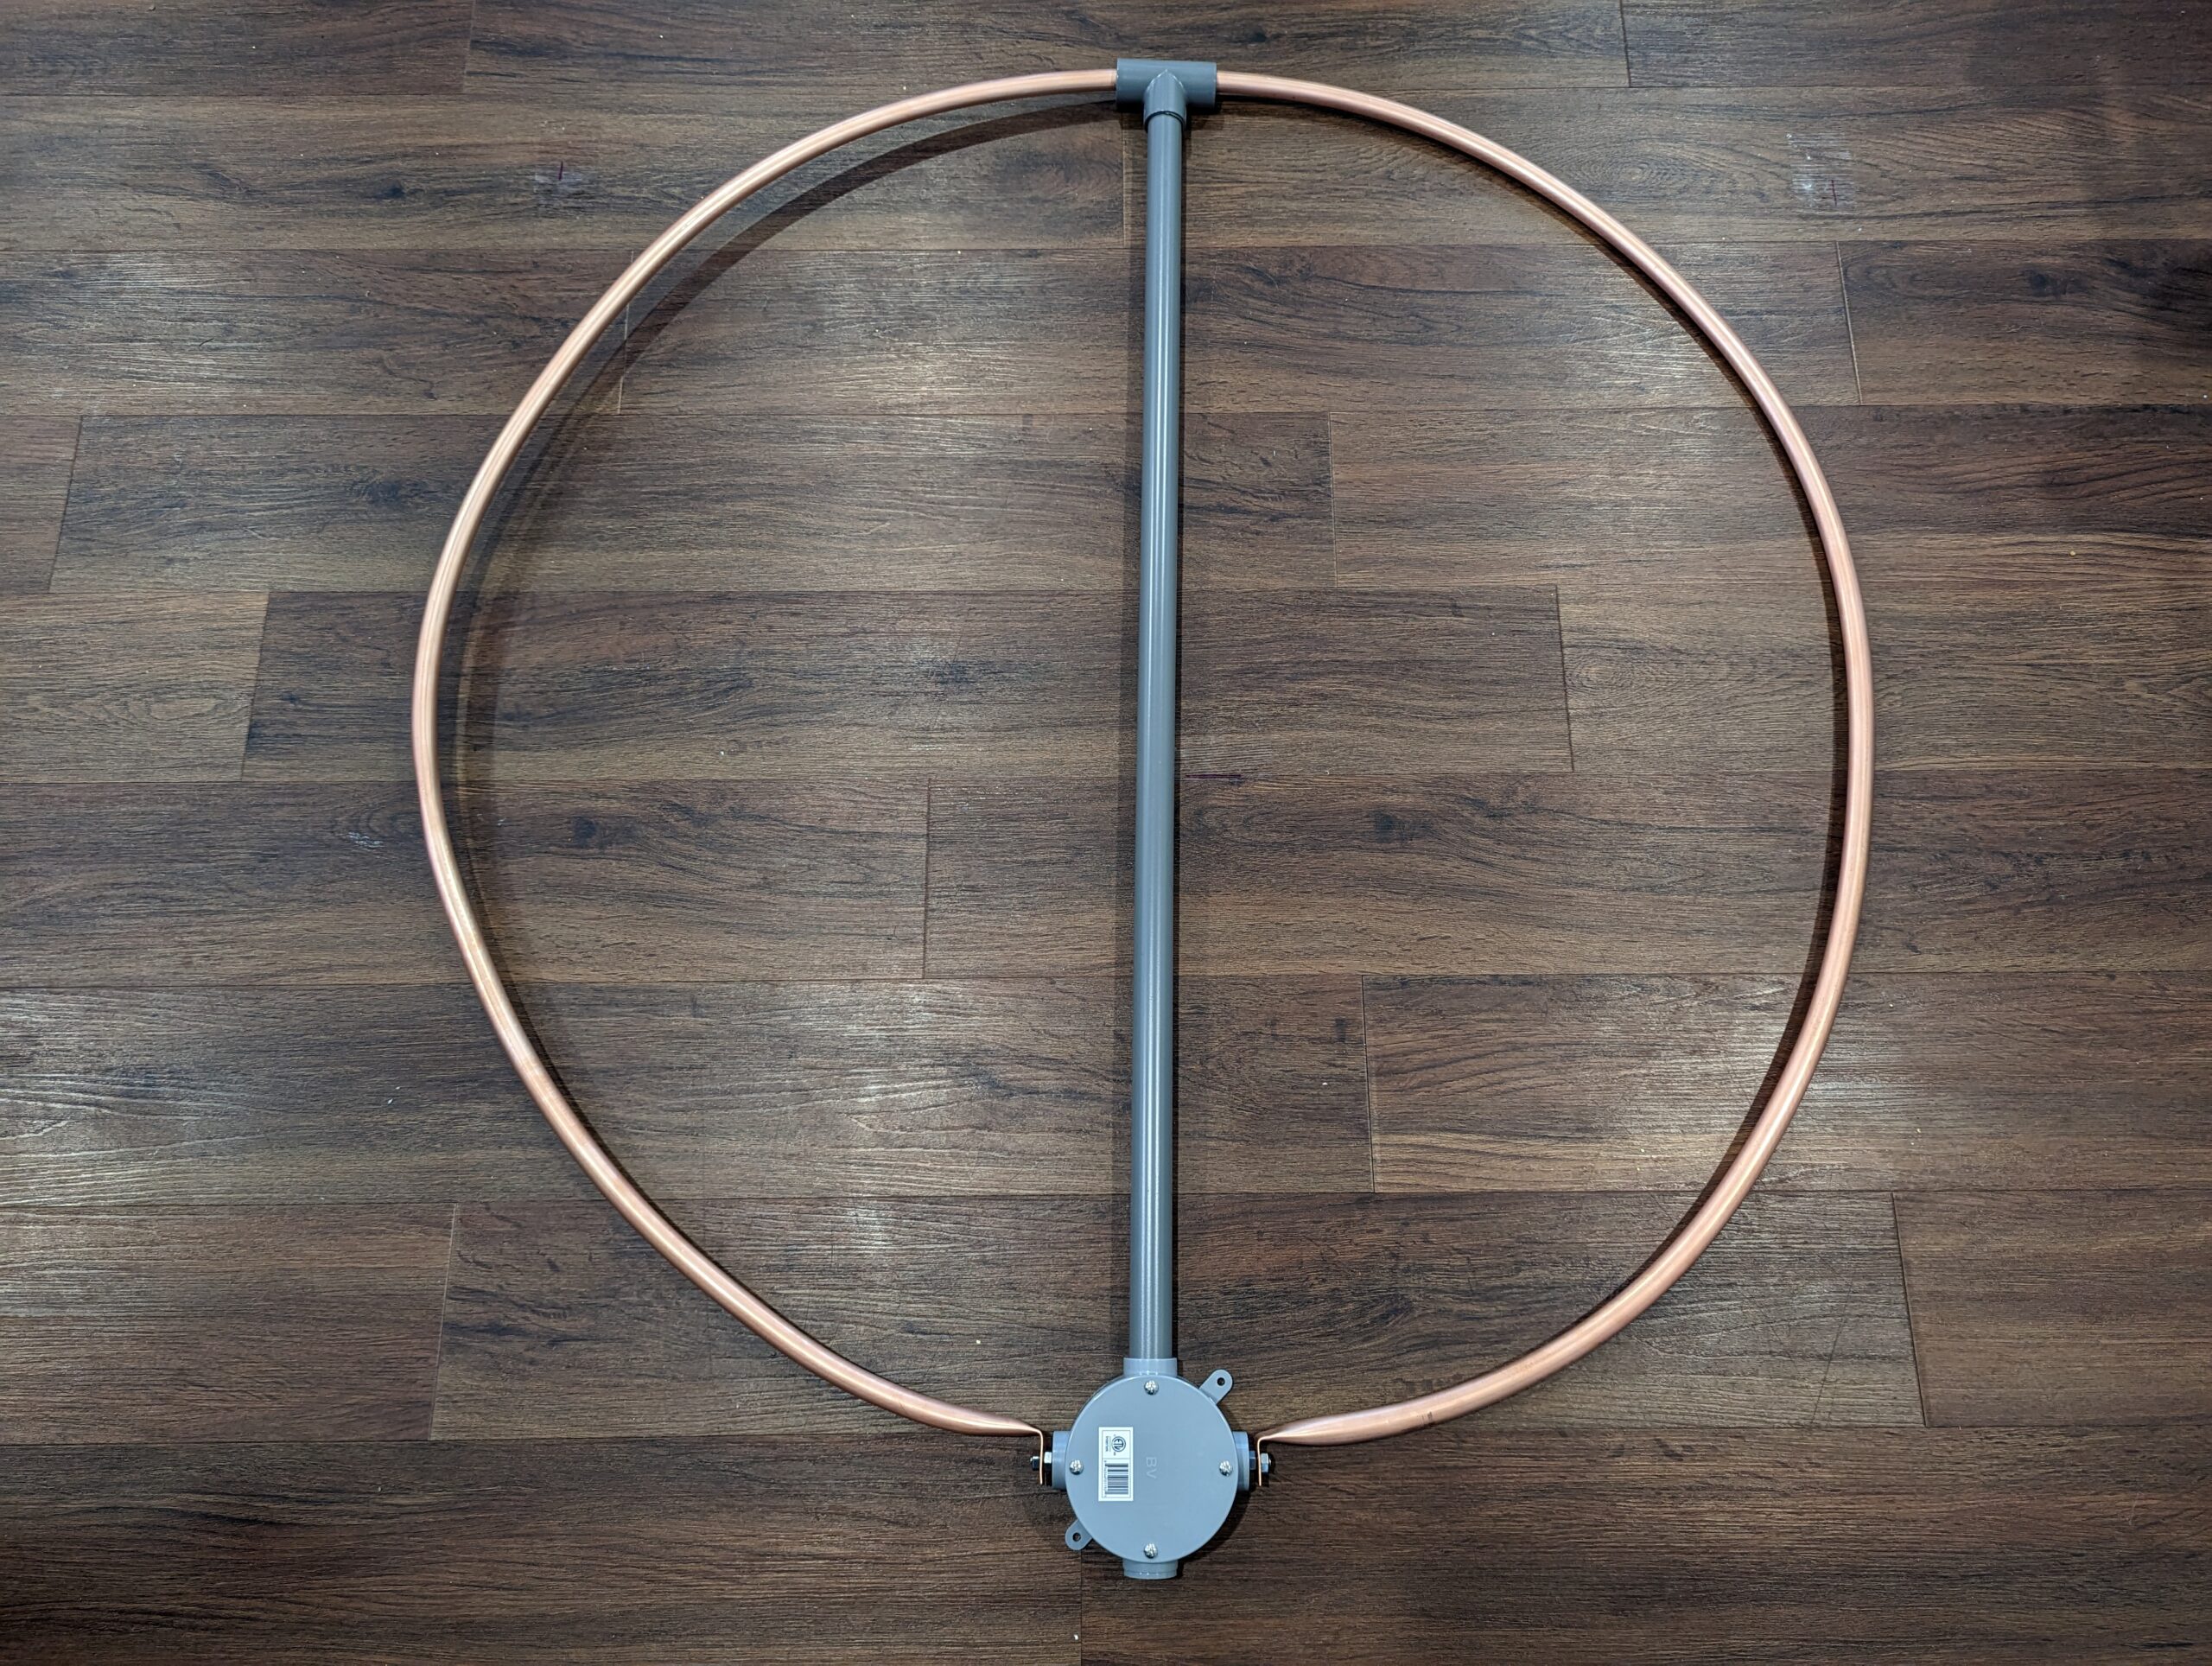
The cheap piano wire that this antenna ships with for an element just doesn’t seem like it’ll be good in the long term. Following a bunch of other people who have this antenna I took some number six copper and laid it out matching the other loop, hammered the ends flat, drilled holes in it, and mounted it up. You can use any copper wire or tube here that’s slightly larger/stronger than the stock wire.
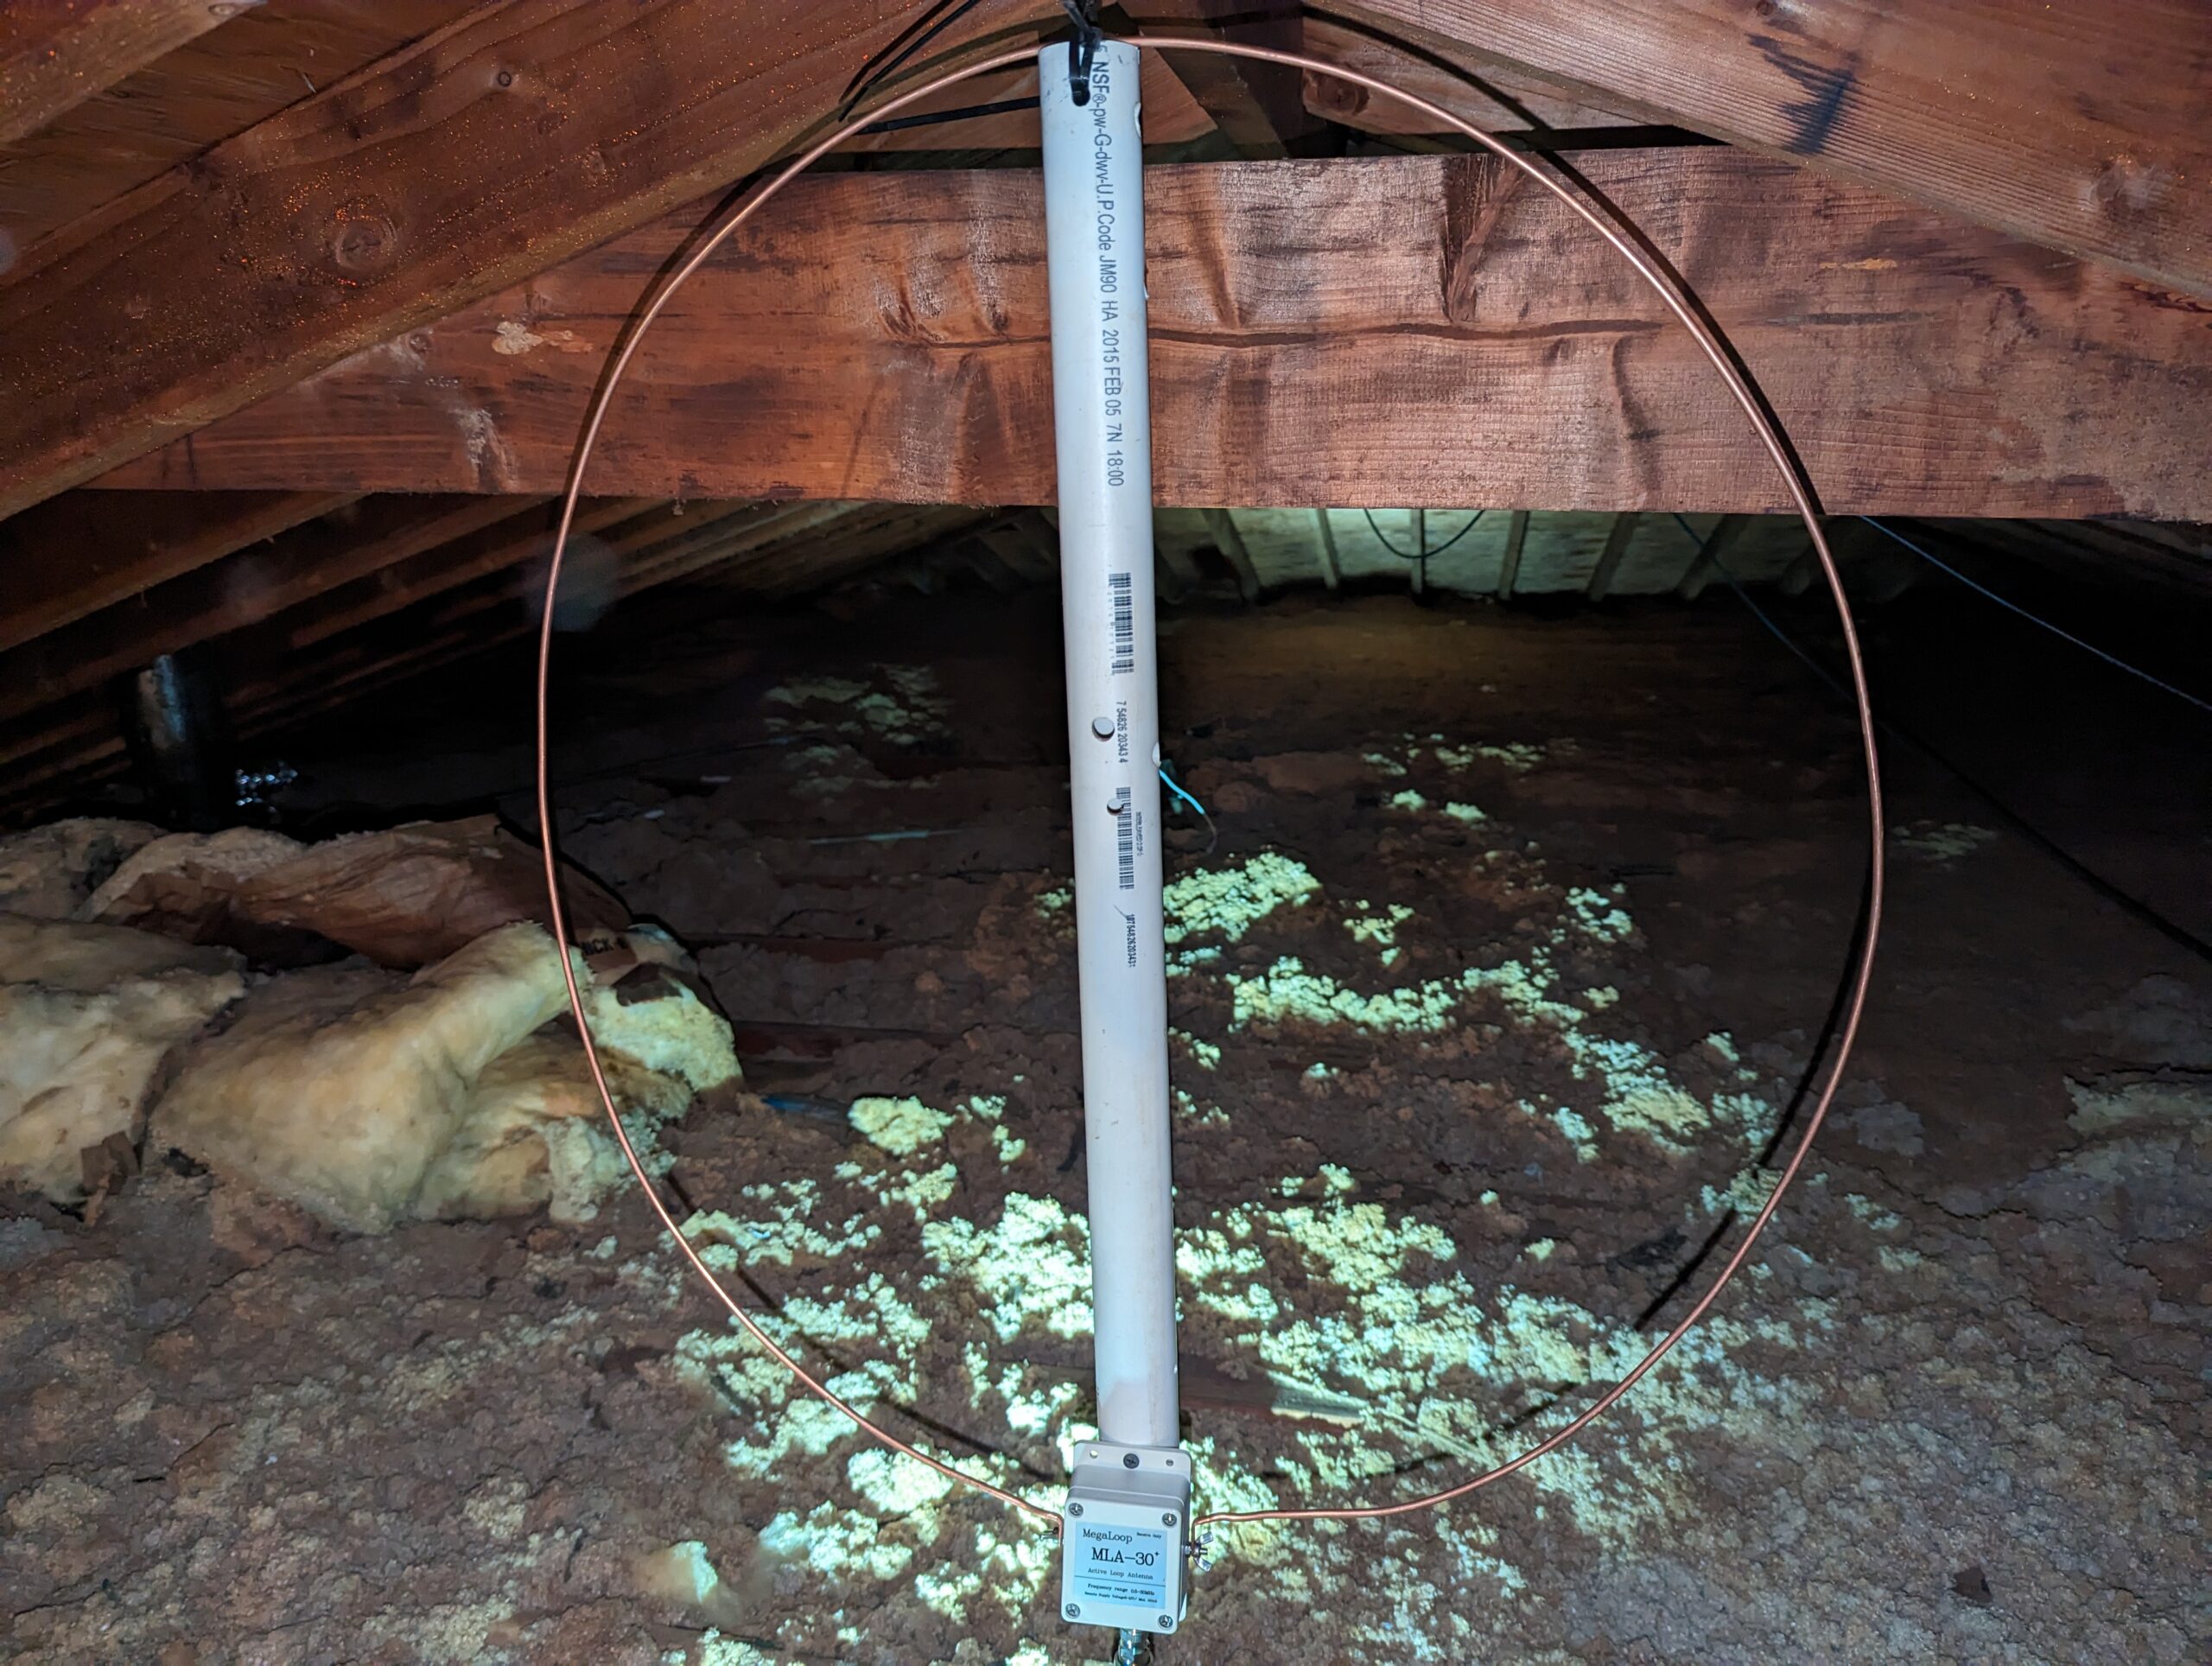
Here it is hanging in my attic with the new feed line and copper element. This is the stock sized loop and some people have seen good results making it a larger 1 meter loop and I will be testing this in the future. All in all this made a decent improvement in some of the stations that I could barely hear before now being more listenable. For the small effort it took to complete these modifications it was worth it.